You work hard to protect your PC from the malicious thugs of our digital world. You keep your antivirus program up to date. You avoid questionable Web sites. You don’t open suspicious email attachments. You keep Java, Flash, and Adobe Reader up-to-date—or better yet, you learn to live without them.
But against all odds, a clever new Trojan horse slipped through the cracks, and now you’re the unhappy owner of an infected PC. Or perhaps a less-vigilant friend has begged you to clean up a plague-ridden mess.
Obviously, you need to scan the computer and remove the malware. Here’s a methodical approach that you can use to determine what the problem is, how to scan, and what to do afterward to protect the PC from future invasions.
1. Verify the infection
Is the PC in question really infected? I’ve seen people blame “another damn virus” for everything from a bad sound card to their own stupidity. The first step in restoring the system’s health is to determine whether what you’re dealing with is a virus rather than a problem with hardware, software, or user error.
If your PC is unusually slow, or if it seems to do a lot of things on its own that you haven’t asked it to do, you have reason to be suspicious. But before you decide that a virus must be responsible, take a moment to launch the Windows Task Manager (right-click the Windows taskbar, and select Task Manager from the pop-up menu). Open the Processestab, and check for any strange or unknown applications running in the background—especially those with nonsensical names and no recognizable authority listed in the description. The odd-looking “wuauclt” process is fine, for example, because it belongs to Microsoft (it’s actually part of the Windows Update service, as you can tell from the description.)
Of course, this is only general guidance; there's nothing to stop a piece of malware from masquerading as a legitimate process by sporting an inoffensive description. That said, you'd be surprised how often a piece of malware gives itself away with a line of strange characters or symbols where the process description should be.
2. Check for sure signs of malware
Truly insidious malware will preemptively block you from trying to remove it. If your PC suddenly won’t load utilities that might help you manually remove malware—such as msconfig or regedit—be suspicious. If your antivirus program suddenly stops loading, that’s a huge red flag.
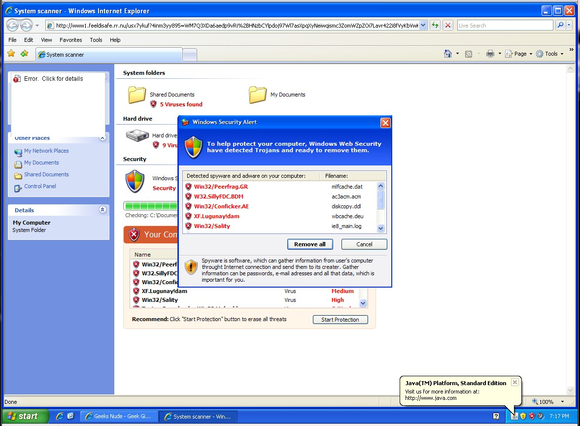
Sometimes the attack is more obvious. If a program you don’t recognize suddenly pops up and starts displaying dire warnings and asks you to run an executable file or asks for your credit card number, your PC is definitely infected with some nasty malware. Never fork over your credit card information or other personal data to a program or website that tries to warn you that your PC is about to die. More often than not it’s a rogue program, fear-mongering malware that tries to scare you into giving up your private info by issuing doomsday warnings of imminent hard drive failure, catastrophic viral infection, or worse.
3. Check online for possible fixes
The one benefit of those scary pop-ups is that they could point you toward a cure. Use your favorite search engine to look for phrases that appear in the pop-up—you’ll probably find other people fighting the same infection. Their experiences could help you identify your enemy or even find step-by-step instructions for removing the malware. Be prudent: Take advice only from sites that seem reputable, and remember to perform a full scan of your PC after you’ve followed any instructions, even ours.
Barring any clues that lead you to a magic solution, scanning becomes your next and most important step.
4. Assume that your old virus scanner is compromised
Don’t waste time scanning your hard drive(s) with your regular antivirus program. After all, that program probably failed to catch the malware in the first place.
But don’t be too hard on it. Nothing’s perfect, and even the best antivirus program can occasionally miss a new or particularly cleverly designed virus. And once that virus slips through, your antivirus program is compromised. You have to assume that the malware, not the security software, is in control.
You need a fresh malware scanner—one that’s not already installed on your computer. It must be capable of detecting and removing malware from your PC, and you need to run it in an environment where the malware can’t load first. Linux is your best bet, but before you jump to that option, try booting into Windows Safe Mode to see if you can outflank your virus infestation there.
5. Use a lightweight scanner inside Safe Mode
Windows has a Safe Mode that boots a minimal version of the operating system, with generic drivers and nothing else. It doesn’t load most startup applications and—most likely—it won’t load the malware that’s infesting your PC.
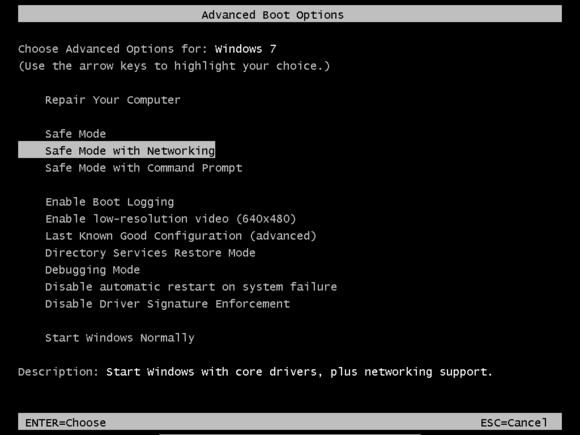
To enter Safe Mode, boot your computer and press the F8 function key before Windows starts loading. The timing is tricky, so it’s best to mash F8 repeatedly from the moment the motherboard manufacturer’s logo appears onscreen until you get the boot menu.
When you reach that menu, select Safe Mode with Networking from the list of boot options. The with Networking part is important—you’re going to need Internet access to solve your virus problem.
Once in Safe Mode, open Internet Explorer (using other browsers in Safe Mode is often problematic) and run a reputable online virus scanner such as Bitdefender. For best results I recommend using the ESET Online Scanner, a Web-based virus detection app that is always up-to-date and runs off a remote server. You’ll have to accept a browser add-in, but the scanner should remove it when it’s done. Before you start the scan, click Advanced settings and enable as many extra levels of scrutiny as you can, including scanning file archives and browser data.
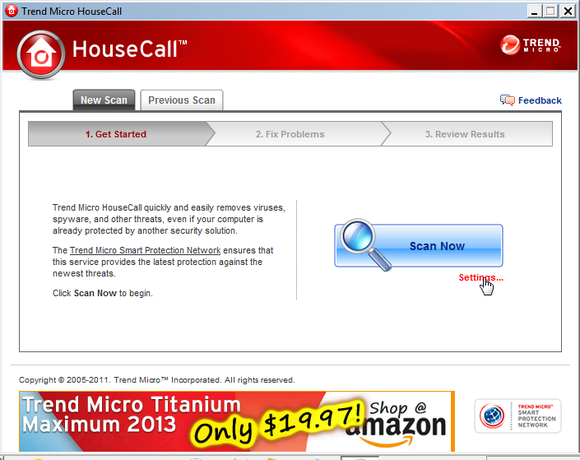
You might also try Trend Micro’s HouseCall. Though it isn’t a Web app, it is portable, so you can download HouseCall on another computer and copy it to a flash drive, thereby creating a portable PC virus scanner. Then, when you run into trouble you can plug the flash drive into the infected PC and run the program from there (you’ll still need an Internet connection for a definition update, however.) When using HouseCall, don’t run it on default settings: Before you click the big blue Scan Now button, click Settings and select Full system scan.
Whichever scanner you use, don’t rush to get through this part of the process. Check the options and select the slowest, most thorough scan. Then, once the scan has started, step away from the PC. Read a book. Do the dishes. Spend time with someone you love. The scan will—and should—take hours.
6. Remember: The second scan's the charm
When that first scan is done—just to be sure—run another one with a different scanner. It’s easy, and you’ll sleep better after multiple scanners have assured you that your drive is clean.
7. Look to Linux as your last line of defense
Booting into Safe Mode may not short-circuit particularly malicious malware. If you still have trouble with an infection after running multiple scans in Safe Mode, you’ll have to bypass Windows altogether and avoid booting from the hard drive. To manage that trick, use a bootable CD or flash drive running a Linux-based antivirus utility.
You don’t have to know Linux to take this step. But you will want an Internet connection, since these scanners must go online to update their malware databases.
The first step is to download a bootable virus scanner as an .iso file. From it, you can easily create a bootable CD. In Windows 7, double-click the file and follow the prompts. In Windows 8, right-click the file and select Burn disc image. For earlier versions of Windows, you’ll need a third-party program such as the free ISO Recorder.
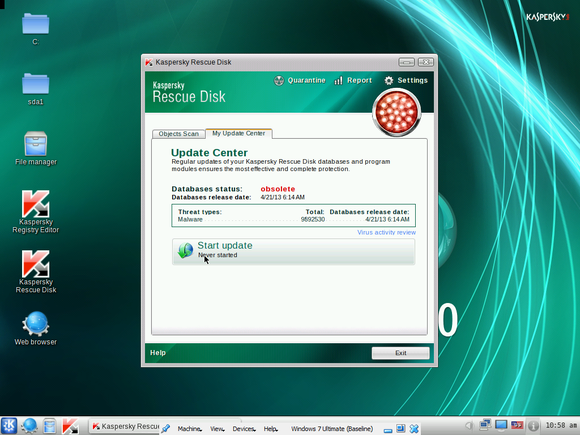
With its Windows-like user interface, the Kaspersky Rescue Disk will make you feel at home. But you have to be careful in setting up the scan. First, the Kaspersky Rescue Disk doesn’t update its malware dictionary automatically. To do this manually, select the Update Center tab and click Start update. Once the utility is updated, return to the Objects Scantab, click Settings, and set the security level to the highest position. Make sure that all of your hard drives are checked before you start the scan and leave the room.
If you want to boot the Kaspersky Rescue Disk from a flash drive, you’ll need to download the prosaically named Utility to record Kaspersky Rescue Disk 10 to USB devices. Save it in the same folder as the .iso file, run the utility, and follow the wizard.
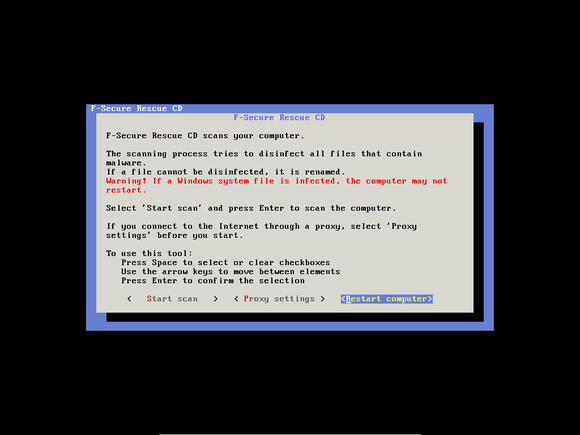
The F-Secure Rescue CD isn’t as outwardly friendly as Kaspersky’s program. In fact, it may make you nostalgic for DOS. But it works, though you may receive the following (unduly alarming) warning message: If a Windows system file is infected, the computer may not restart. I’ve never heard of anyone whose Windows system failed to restart after an F-Secure scan, and I suspect that the eventuality is very rare. I also suspect that if malware did infect a Windows system file—and if F-Secure couldn’t clean the file without destroying it—reinstallation might be your only option anyway.
F-Secure has a stripped down, unattractive, text-based user interface. But unlike Kaspersky, it updates its definitions automatically (if it can find an Internet connection), and starts a full, thorough scan with no fuss—you have to do little more than agree to the EULA.
F-Secure doesn’t offer a special USB utility. If you want to move a copy of it onto a flash drive, you’ll have to download and run the Universal USB Installer. In Step 1, you’ll find F-Secure Rescue CD near the bottom of a very long list. I suggest you go straight to the bottom, and then look for it while slowly scrolling up.
8. Protect your newly disinfected PC
When you’re satisfied that your drive is clean, try rebooting into good old Windows. Then uninstall your old antivirus program—it has been compromised.
Of course, you don’t want to stay unprotected. Reinstall the program and update to the latest version, or (if you’ve lost all faith in it) install a competitor. For more information on how to choose the best antivirus program for your needs, check out our full rundown—with empirical testing—of the best security software available today.
Because when it comes to malware, a byte of prevention is worth a terabyte of cure.

No comments:
Post a Comment