With Windows 8 pushing a “touch-first” desktop interface—Microsoft’s words, not ours—and with Valve’s Steam on Linux beginning to bring much-needed games and popular attention to the oft-overlooked operating system, there’s never been a better time to take Linux out for a test drive.
Dipping your toes into the penguin-filled waters of the most popular open-source ecosystem is easy, and you don't have to commit to switching outright to Linux. You can install it alongside your current Windows system, or even try it without installing anything at all.
Ubuntu is the most popular Linux distribution for desktop and laptop Linux users, so we’ll focus on Ubuntu throughout this guide. For the most part, Ubuntu just plain works. It sports a subtle interface that stays out of your way. It enjoys strong support from software developers (including Valve, since Steam on Linux only officially supports Ubuntu). And you can find tons of information online if you run into problems.
Installing Ubuntu
To get an idea of how Ubuntu works and what it looks like on your PC without committing to anything you might later regret, you'll need to create your own Ubuntu boot device.
First, get an Ubuntu disc image from the Ubuntu website. After downloading the ISO file, right-click it, and you can then burn it to a writable CD or DVD. If you’d rather put Ubuntu on a USB drive, first take a moment to look over our guide to this procedure. If you run into any trouble creating a Ubuntu USB boot drive, consult the Ubuntu website for troubleshooting tips.

After creating your Ubuntu disc or USB drive, insert it in your PC and restart the system. It should automatically boot into the live Ubuntu environment. At this point, you can play around with Ubuntu without installing anything on your computer—though it will run slower—or you can move on to installing it. If you install Ubuntu alongside Windows, you’ll see a boot menu that asks you to choose your operating system whenever you boot your computer.
For an easier way to install Ubuntu, use Wubi, the officially supported Windows Ubuntu Installer. Wubi lets you install Ubuntu from within Windows, just as you would any other program.
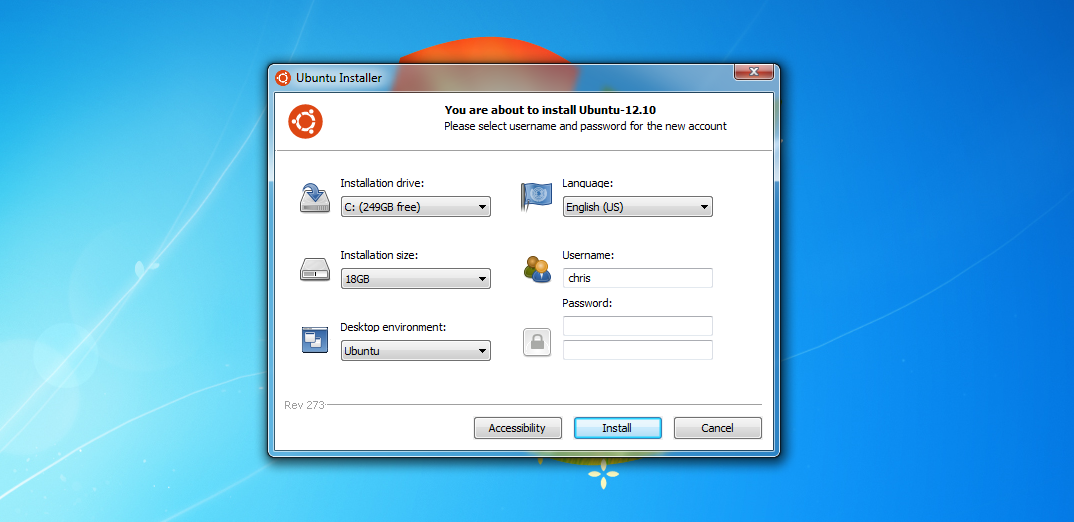
You’ll be able to boot into Ubuntu when you start your computer. But because its files are stored on the Windows file system instead of on its own dedicated Linux partitions, Ubuntu won’t run as quickly as in this setup as it would by itself. That's something to keep in mind if you plan to play demanding games or use Ubuntu all the time. On the other hand, Wubi enables you to uninstall Ubuntu very easily—directly from the Windows Add/Remove Programs control panel.
Forget about digging around for drivers
If your hardware is properly supported (as most contemporary PC hardware is), Ubuntu should work fine out of the box. Everything necessary for using it is included in the base operating system. You don’t have to hunt down driver installation packages on your computer manufacturer's website, as you do with Windows.
The only exception involves advanced video drivers. If you have an Nvidia or ATI card, Ubuntu may prompt you to install your manufacturer’s proprietary graphics drivers for maximum 3D graphics performance. Even then, you can complete the process in a few clicks after Ubuntu alerts you.
Loading up on software
Ubuntu comes with quite a bit of preinstalled software, including such notable applications as the Firefox browser and the LibreOffice office suite. For additional items, you'll have to delve into the Linux software repository.
Installing applications on Linux doesn't involve visiting Google, searching for an application while dodging malware, and downloading the installer from a third-party website. Instead, Linux maintains software repositories, which are similar to app stores (although Linux had them many years earlier.)
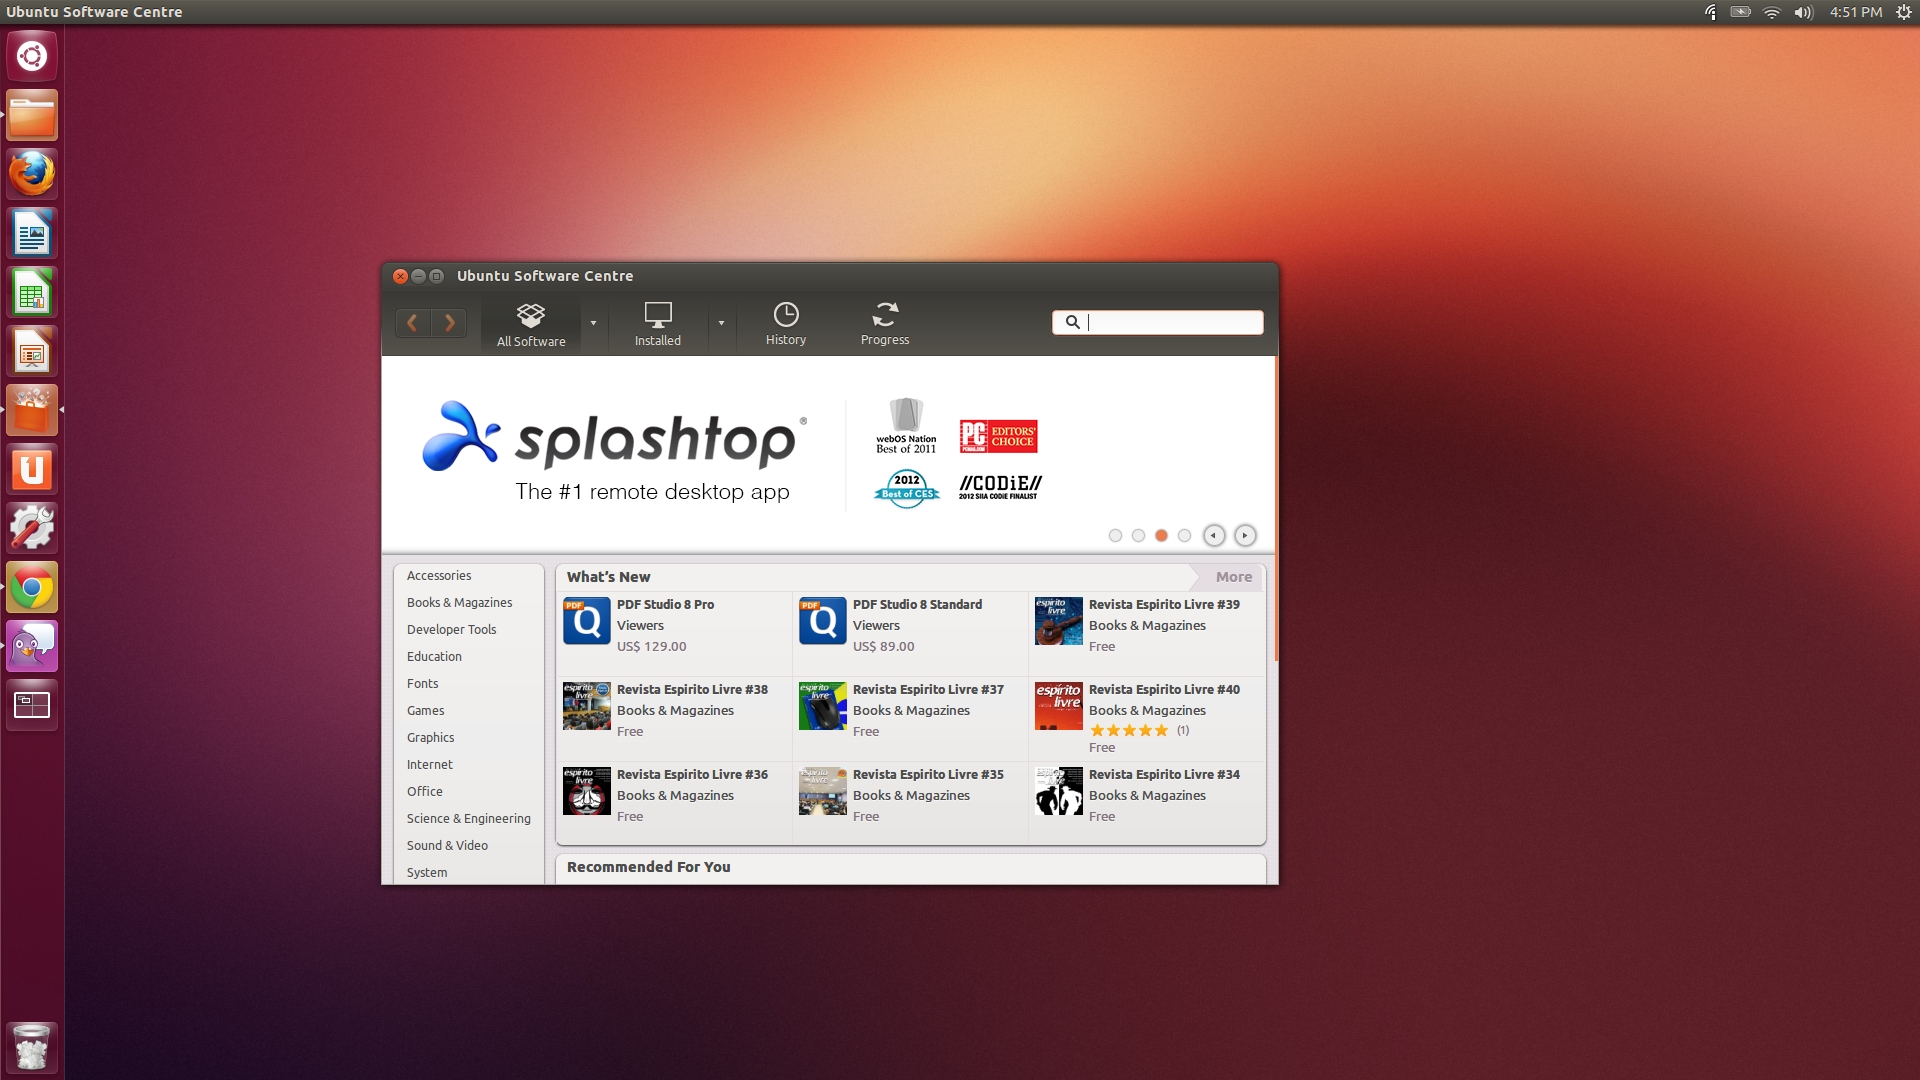
To install software on Ubuntu, open the Ubuntu Software Center—the shopping-bag-like icon on the dock at the left side of your screen—and run a search for the type of software you want to install. The Ubuntu Software Center is full of free, open-source applications compiled for Ubuntu, as well as some commercial applications available for a small fee. The Ubuntu Software Center acts as a user-friendly front end to Ubuntu’s software management tools, which you can also access from other applications or with terminal commands.
A few applications that you might want to use—such as Google Chrome and Steam—aren’t in the Ubuntu Software Center. You can pick these up from their associated websites (Google’s Chrome website or Valve’s Steam website), downloading them as .deb files. Double-click a .deb file and Ubuntu will prompt you to install it.
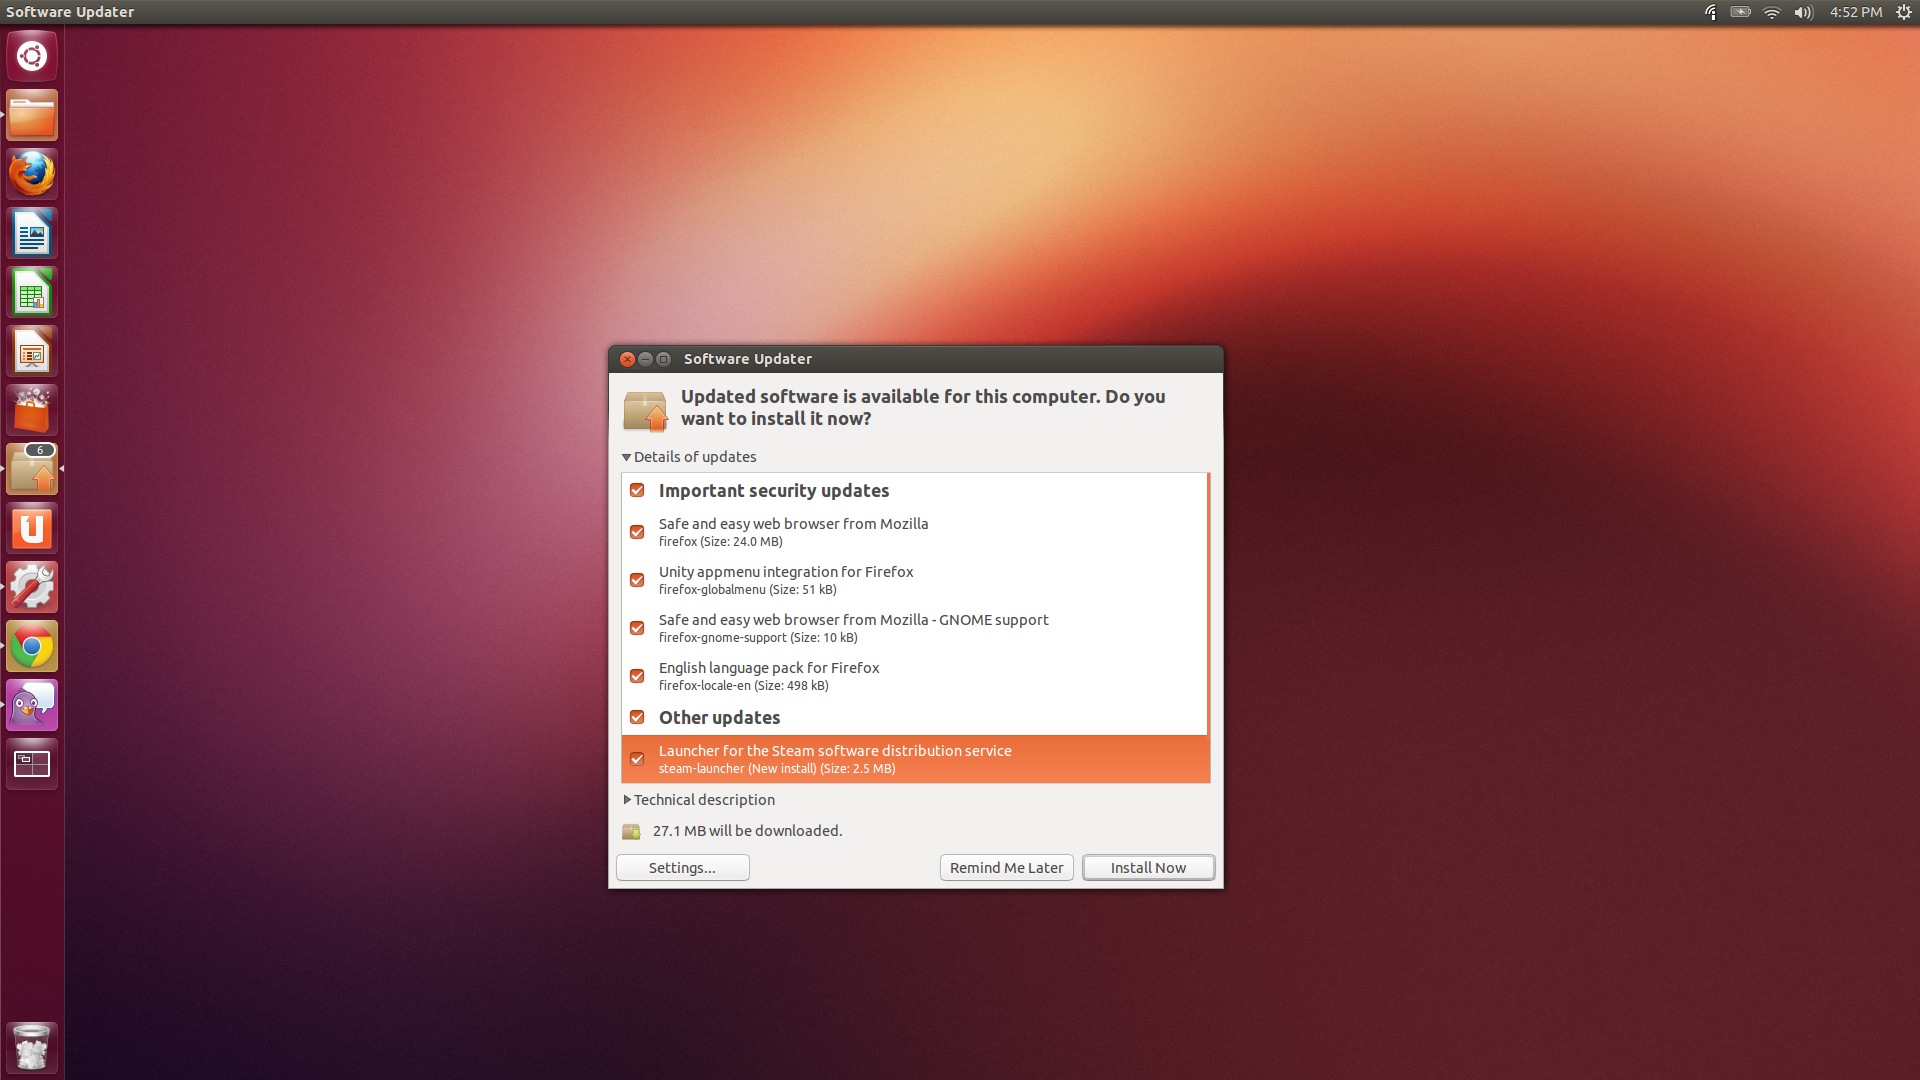
Unlike with Windows, where every application must include its own updater, standard software management tools handle all updates on an Ubuntu system. When updates are available in Ubuntu’s repositories, the Software Updater will appear. When you install third-party software like Google Chrome or Steam, the source of the application adds its own software repository, and updates will appear in the Software Updater.
Using Ubuntu’s Unity Desktop
Ubuntu’s default desktop environment, named Unity, is one of many possible desktops you can use. Linux lets you experiment with different options until you find the one that's right for you. Here are the main Unity features you should know about.
The dock: Unity should feel very familiar to users of Windows 7. Its a Windows 7-style taskbar (known as the dock) appears on the left side of the screen. Like the Windows taskbar, it shows both running and not-running application and has right-click jump lists (known as “quick lists”). Unlike the Windows taskbar, the dock’s location can’t be changed to another edge of the screen.
The dash: The dock doesn’t show all your installed applications. To open the dash so you can reach other applications, click the Ubuntu icon in the upper-left corner of your screen, or press the Windows key (known as the Super key in Linux). The dash allows you to search and browse your installed applications and files, among other things. Use the search feature to find an installed application, or click the Applications icon at the bottom of the dash to browse all of your installed applications.
Locking and unlocking app icons: When you open a new application, its icon will appear on the dash for as long as it’s running. You can right-click icons to lock them to and unlock them from the dock, just as you can pin and unpin them on the WIndows taskbar.
Application menus: Ubuntu uses a Mac-style universal menu bar by default. So if you’re using Firefox, you’ll find the File/Edit/View menus on the panel at the top of your screen, not in the Firefox window itself.
Your Home folder: Open Ubuntu’s file manager, and you’ll see your Home folder. This is where you store your personal files, just as you would on the C:\Users\Name folder in Windows. But unlike in Windows, your user account doesn’t have write access to areas in Ubuntu outside your home folder, so get used to storing your files here.
Workspaces: Linux has always offered excellent support for workspaces, also known as virtual desktops. A virtual desktop is essentially its own self-contained workspace with a different set of open windows. You can switch between workspaces with hotkeys by pressing Ctrl-Alt-arrow key.
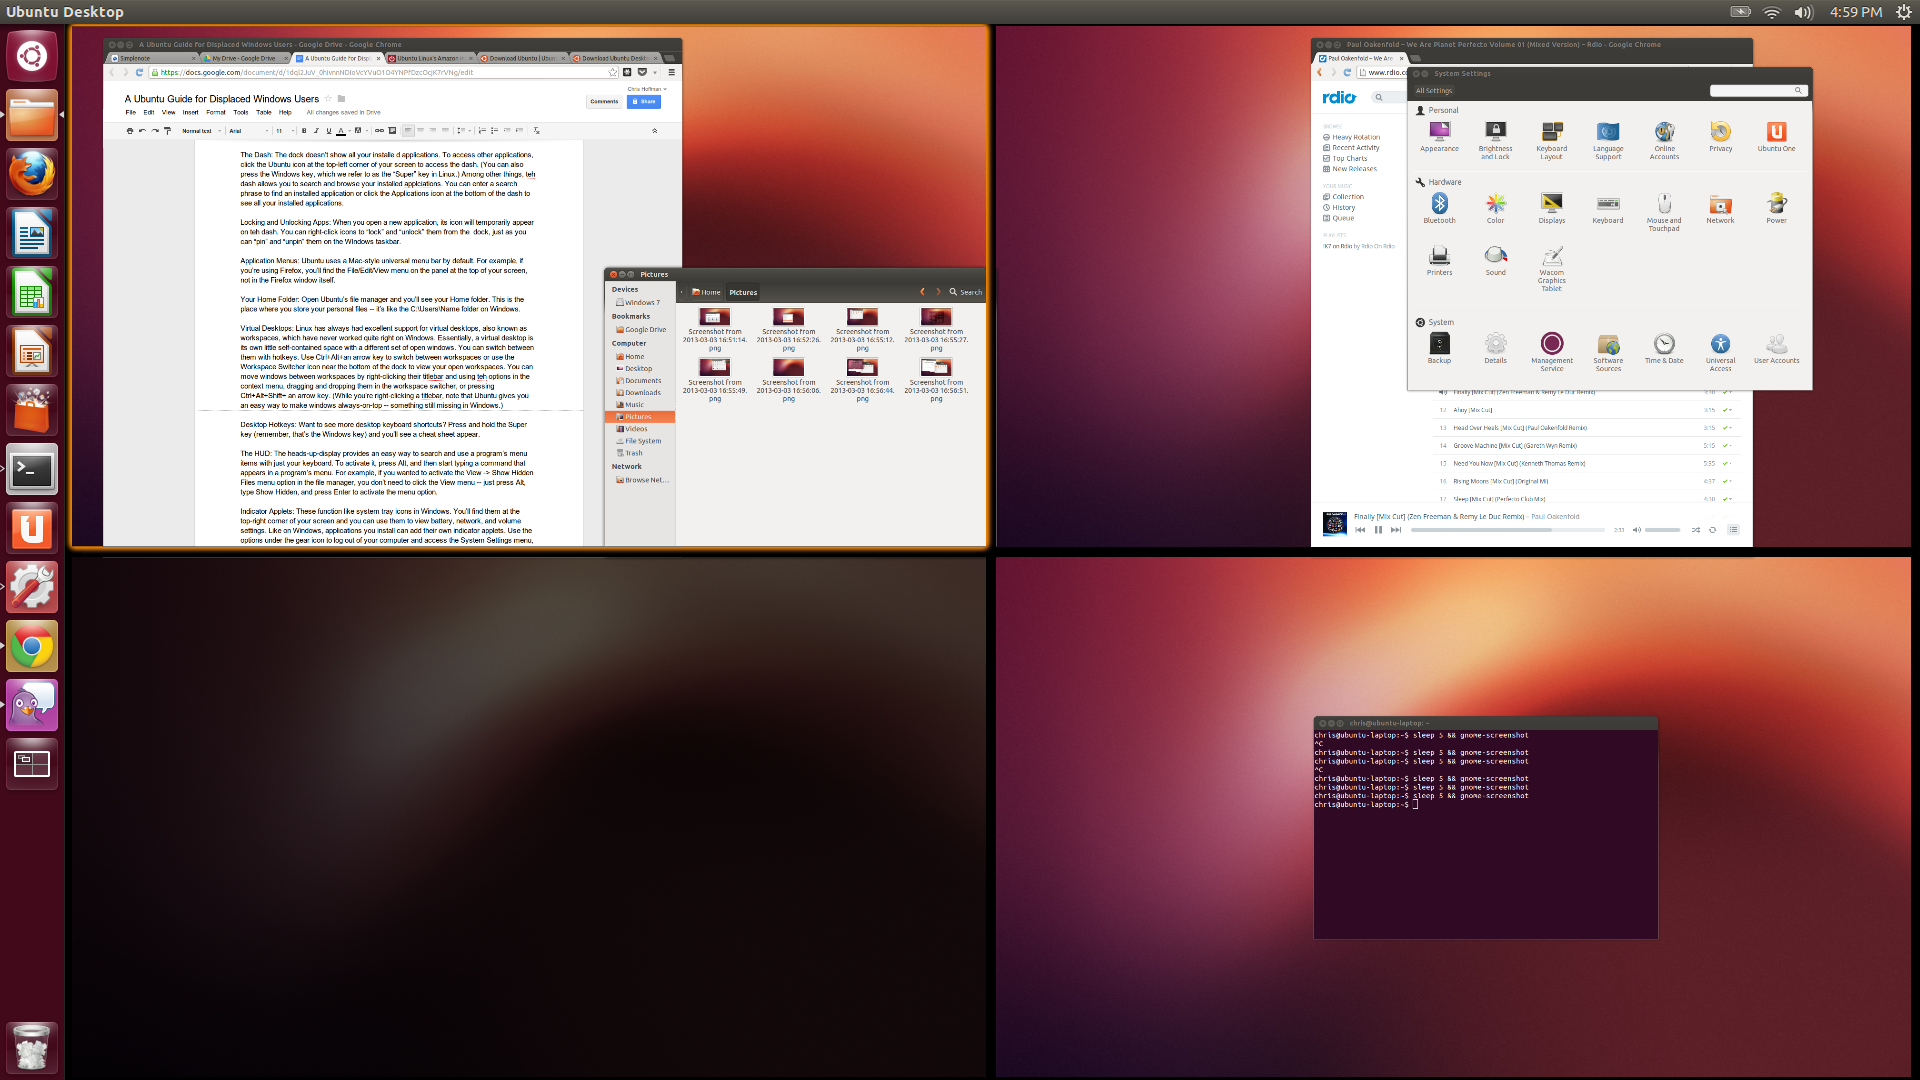
The Workspace Switcher icon located near the bottom of the dock also allows you to view and manage your workspaces. You can move windows between workspaces in any of three ways: right-click their title bars and use the options in the context menu; drag and drop them in the workspace switcher; or press Ctrl-Alt-Shift-arrow key.
The HUD: The Ubuntu heads-up display provides an easy way to search and use an application’s menu items with just your keyboard. To activate it, press Alt and start typing a command that appears in a program’s menu. For example, if you want to activate the View > Show Hidden Files menu option in the file manager, you can press Alt, type
Show Hidden, and press Enter to activate the menu option. You can also use this feature to search for and find menu options.
Indicator applets: Like system tray icons in Windows, indicator applets show your battery state, network connection, and sound settings. You’ll find them in the upper-right corner of your screen. In Ubuntu, as in Windows, applications that you install can add their own indicator applets. Use the options under the gear icon in the upper-right corner of your screen to shut down your computer or to access the System Settings window, which corresponds to the Windows Control Panel.
Desktop hotkeys: For more Unity keyboard shortcuts, press and hold the Super key (aka the Windows key), and a cheat sheet will appear.
Your journey continues
This introduction just scratches the surface of what you can do with Ubuntu. We haven’t discussed using the terminal (it’s an amazing power-user tool once you get used to it), and we haven't looked at any of the many other desktop environments you can try if you don’t like the way Unity works. Linux is so flexible that you can make Ubuntu look more like Windows 7 than Windows 8 can.
If you want to dig deeper and get your hands dirty in the terminal, or install an alternative desktop environment, you can—but you don’t have to. Ubuntu's flexibility is refreshing after extended exposure to Windows 8's one-size-fits-all approach to the desktop, which takes options away from desktop users in order to unify the Windows ecosystem and (ultimately) serve Microsoft’s bottom line. Linux takes the opposite approach, providing options and letting you make your own decisions.
No comments:
Post a Comment